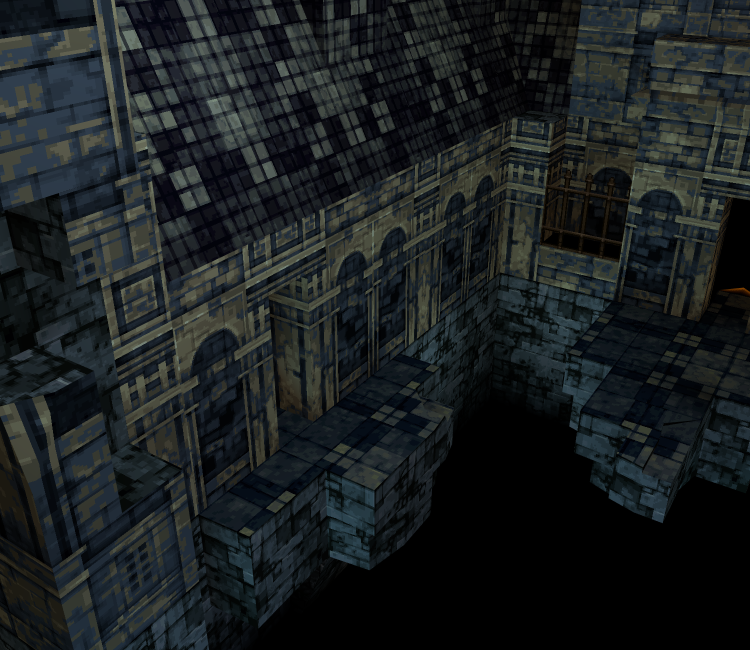
Great Cathedral L2
(Current scale is below 100% - zoom in to view full detail)
| Name |
Great Cathedral L2 |
| Category |
PlayStation |
| Game |
Vagrant Story |
| Section |
Locations |
| Submitted |
April 15, 2026 |
| Uploaded By |
Dazz |
| Size |
4.57 MB (137 items) arrow_right
- Great Cathedral L2\MAP074 - He Screams for Mercy\MAP074.gltf
- Great Cathedral L2\MAP074 - He Screams for Mercy\MAP074.mtl
- Great Cathedral L2\MAP074 - He Screams for Mercy\MAP074.obj
- Great Cathedral L2\MAP074 - He Screams for Mercy\MAP074_0.png
- Great Cathedral L2\MAP074 - He Screams for Mercy\MAP074_1.png
- Great Cathedral L2\MAP074 - He Screams for Mercy\MAP074_2.png
- Great Cathedral L2\MAP074 - He Screams for Mercy\MAP074_3.png
- Great Cathedral L2\MAP074 - He Screams for Mercy\MAP074_4.png
- Great Cathedral L2\MAP074 - He Screams for Mercy\MAP074_5.png
- Great Cathedral L2\MAP074 - He Screams for Mercy\MAP074_6.png
- Great Cathedral L2\MAP074 - He Screams for Mercy\MAP074_7.png
- Great Cathedral L2\MAP074 - He Screams for Mercy\MAP074_8.png
- Great Cathedral L2\MAP074 - He Screams for Mercy\MAP074_9.png
- Great Cathedral L2\MAP075 - Light and Dark Wage War\MAP075.gltf
- Great Cathedral L2\MAP075 - Light and Dark Wage War\MAP075.mtl
- Great Cathedral L2\MAP075 - Light and Dark Wage War\MAP075.obj
- Great Cathedral L2\MAP075 - Light and Dark Wage War\MAP075_0.png
- Great Cathedral L2\MAP075 - Light and Dark Wage War\MAP075_1.png
- Great Cathedral L2\MAP075 - Light and Dark Wage War\MAP075_2.png
- Great Cathedral L2\MAP075 - Light and Dark Wage War\MAP075_3.png
- Great Cathedral L2\MAP075 - Light and Dark Wage War\MAP075_4.png
- Great Cathedral L2\MAP075 - Light and Dark Wage War\MAP075_5.png
- Great Cathedral L2\MAP075 - Light and Dark Wage War\MAP075_6.png
- Great Cathedral L2\MAP075 - Light and Dark Wage War\MAP075_7.png
- Great Cathedral L2\MAP076 - Abasement from Above\MAP076.gltf
- Great Cathedral L2\MAP076 - Abasement from Above\MAP076.mtl
- Great Cathedral L2\MAP076 - Abasement from Above\MAP076.obj
- Great Cathedral L2\MAP076 - Abasement from Above\MAP076_0.png
- Great Cathedral L2\MAP076 - Abasement from Above\MAP076_1.png
- Great Cathedral L2\MAP076 - Abasement from Above\MAP076_2.png
- Great Cathedral L2\MAP076 - Abasement from Above\MAP076_3.png
- Great Cathedral L2\MAP076 - Abasement from Above\MAP076_4.png
- Great Cathedral L2\MAP076 - Abasement from Above\MAP076_5.png
- Great Cathedral L2\MAP076 - Abasement from Above\MAP076_6.png
- Great Cathedral L2\MAP076 - Abasement from Above\MAP076_7.png
- Great Cathedral L2\MAP076 - Abasement from Above\MAP076_8.png
- Great Cathedral L2\MAP088 - Maelstrom of Malice\MAP088.gltf
- Great Cathedral L2\MAP088 - Maelstrom of Malice\MAP088.mtl
- Great Cathedral L2\MAP088 - Maelstrom of Malice\MAP088.obj
- Great Cathedral L2\MAP088 - Maelstrom of Malice\MAP088_0.png
- Great Cathedral L2\MAP088 - Maelstrom of Malice\MAP088_1.png
- Great Cathedral L2\MAP088 - Maelstrom of Malice\MAP088_2.png
- Great Cathedral L2\MAP088 - Maelstrom of Malice\MAP088_3.png
- Great Cathedral L2\MAP088 - Maelstrom of Malice\MAP088_4.png
- Great Cathedral L2\MAP088 - Maelstrom of Malice\MAP088_5.png
- Great Cathedral L2\MAP088 - Maelstrom of Malice\MAP088_6.png
- Great Cathedral L2\MAP088 - Maelstrom of Malice\MAP088_7.png
- Great Cathedral L2\MAP088 - Maelstrom of Malice\MAP088_8.png
- Great Cathedral L2\MAP089 - The Acolyte's Weakness\MAP089.gltf
- Great Cathedral L2\MAP089 - The Acolyte's Weakness\MAP089.mtl
- Great Cathedral L2\MAP089 - The Acolyte's Weakness\MAP089.obj
- Great Cathedral L2\MAP089 - The Acolyte's Weakness\MAP089_0.png
- Great Cathedral L2\MAP089 - The Acolyte's Weakness\MAP089_1.png
- Great Cathedral L2\MAP089 - The Acolyte's Weakness\MAP089_2.png
- Great Cathedral L2\MAP089 - The Acolyte's Weakness\MAP089_3.png
- Great Cathedral L2\MAP089 - The Acolyte's Weakness\MAP089_4.png
- Great Cathedral L2\MAP089 - The Acolyte's Weakness\MAP089_5.png
- Great Cathedral L2\MAP089 - The Acolyte's Weakness\MAP089_6.png
- Great Cathedral L2\MAP089 - The Acolyte's Weakness\MAP089_7.png
- Great Cathedral L2\MAP090 - The Hall of Broken Vows\MAP090.gltf
- Great Cathedral L2\MAP090 - The Hall of Broken Vows\MAP090.mtl
- Great Cathedral L2\MAP090 - The Hall of Broken Vows\MAP090.obj
- Great Cathedral L2\MAP090 - The Hall of Broken Vows\MAP090_0.png
- Great Cathedral L2\MAP090 - The Hall of Broken Vows\MAP090_1.png
- Great Cathedral L2\MAP090 - The Hall of Broken Vows\MAP090_2.png
- Great Cathedral L2\MAP090 - The Hall of Broken Vows\MAP090_3.png
- Great Cathedral L2\MAP090 - The Hall of Broken Vows\MAP090_4.png
- Great Cathedral L2\MAP090 - The Hall of Broken Vows\MAP090_5.png
- Great Cathedral L2\MAP090 - The Hall of Broken Vows\MAP090_6.png
- Great Cathedral L2\MAP090 - The Hall of Broken Vows\MAP090_7.png
- Great Cathedral L2\MAP090 - The Hall of Broken Vows\MAP090_8.png
- Great Cathedral L2\MAP091 - The Melodics of Madness\MAP091.gltf
- Great Cathedral L2\MAP091 - The Melodics of Madness\MAP091.mtl
- Great Cathedral L2\MAP091 - The Melodics of Madness\MAP091.obj
- Great Cathedral L2\MAP091 - The Melodics of Madness\MAP091_0.png
- Great Cathedral L2\MAP091 - The Melodics of Madness\MAP091_1.png
- Great Cathedral L2\MAP091 - The Melodics of Madness\MAP091_2.png
- Great Cathedral L2\MAP091 - The Melodics of Madness\MAP091_3.png
- Great Cathedral L2\MAP091 - The Melodics of Madness\MAP091_4.png
- Great Cathedral L2\MAP091 - The Melodics of Madness\MAP091_5.png
- Great Cathedral L2\MAP091 - The Melodics of Madness\MAP091_6.png
- Great Cathedral L2\MAP091 - The Melodics of Madness\MAP091_7.png
- Great Cathedral L2\MAP091 - The Melodics of Madness\MAP091_8.png
- Great Cathedral L2\MAP091 - The Melodics of Madness\MAP091_9.png
- Great Cathedral L2\MAP092 - Free from Base Desires\MAP092.gltf
- Great Cathedral L2\MAP092 - Free from Base Desires\MAP092.mtl
- Great Cathedral L2\MAP092 - Free from Base Desires\MAP092.obj
- Great Cathedral L2\MAP092 - Free from Base Desires\MAP092_0.png
- Great Cathedral L2\MAP092 - Free from Base Desires\MAP092_1.png
- Great Cathedral L2\MAP092 - Free from Base Desires\MAP092_2.png
- Great Cathedral L2\MAP092 - Free from Base Desires\MAP092_3.png
- Great Cathedral L2\MAP092 - Free from Base Desires\MAP092_4.png
- Great Cathedral L2\MAP092 - Free from Base Desires\MAP092_5.png
- Great Cathedral L2\MAP092 - Free from Base Desires\MAP092_6.png
- Great Cathedral L2\MAP092 - Free from Base Desires\MAP092_7.png
- Great Cathedral L2\MAP092 - Free from Base Desires\MAP092_8.png
- Great Cathedral L2\MAP092 - Free from Base Desires\MAP092_9.png
- Great Cathedral L2\MAP092 - Free from Base Desires\MAP092_10.png
- Great Cathedral L2\MAP093 - The Convent Room\MAP093.gltf
- Great Cathedral L2\MAP093 - The Convent Room\MAP093.mtl
- Great Cathedral L2\MAP093 - The Convent Room\MAP093.obj
- Great Cathedral L2\MAP093 - The Convent Room\MAP093_0.png
- Great Cathedral L2\MAP093 - The Convent Room\MAP093_1.png
- Great Cathedral L2\MAP093 - The Convent Room\MAP093_2.png
- Great Cathedral L2\MAP093 - The Convent Room\MAP093_3.png
- Great Cathedral L2\MAP093 - The Convent Room\MAP093_4.png
- Great Cathedral L2\MAP093 - The Convent Room\MAP093_5.png
- Great Cathedral L2\MAP093 - The Convent Room\MAP093_6.png
- Great Cathedral L2\MAP093 - The Convent Room\MAP093_7.png
- Great Cathedral L2\MAP093 - The Convent Room\MAP093_8.png
- Great Cathedral L2\MAP093 - The Convent Room\MAP093_9.png
- Great Cathedral L2\MAP095 - An Arrow into Darkness\MAP095.gltf
- Great Cathedral L2\MAP095 - An Arrow into Darkness\MAP095.mtl
- Great Cathedral L2\MAP095 - An Arrow into Darkness\MAP095.obj
- Great Cathedral L2\MAP095 - An Arrow into Darkness\MAP095_0.png
- Great Cathedral L2\MAP095 - An Arrow into Darkness\MAP095_1.png
- Great Cathedral L2\MAP095 - An Arrow into Darkness\MAP095_2.png
- Great Cathedral L2\MAP095 - An Arrow into Darkness\MAP095_3.png
- Great Cathedral L2\MAP095 - An Arrow into Darkness\MAP095_4.png
- Great Cathedral L2\MAP095 - An Arrow into Darkness\MAP095_5.png
- Great Cathedral L2\MAP095 - An Arrow into Darkness\MAP095_6.png
- Great Cathedral L2\MAP095 - An Arrow into Darkness\MAP095_7.png
- Great Cathedral L2\MAP095 - An Arrow into Darkness\MAP095_8.png
- Great Cathedral L2\MAP095 - An Arrow into Darkness\MAP095_9.png
- Great Cathedral L2\MAP096 - What Ails You, Kills You\MAP096.gltf
- Great Cathedral L2\MAP096 - What Ails You, Kills You\MAP096.mtl
- Great Cathedral L2\MAP096 - What Ails You, Kills You\MAP096.obj
- Great Cathedral L2\MAP096 - What Ails You, Kills You\MAP096_0.png
- Great Cathedral L2\MAP096 - What Ails You, Kills You\MAP096_1.png
- Great Cathedral L2\MAP096 - What Ails You, Kills You\MAP096_2.png
- Great Cathedral L2\MAP096 - What Ails You, Kills You\MAP096_3.png
- Great Cathedral L2\MAP096 - What Ails You, Kills You\MAP096_4.png
- Great Cathedral L2\MAP096 - What Ails You, Kills You\MAP096_5.png
- Great Cathedral L2\MAP096 - What Ails You, Kills You\MAP096_6.png
- Great Cathedral L2\MAP096 - What Ails You, Kills You\MAP096_7.png
- Great Cathedral L2\MAP096 - What Ails You, Kills You\MAP096_8.png
- Great Cathedral L2\MAP096 - What Ails You, Kills You\MAP096_9.png
|
| Format |
ZIP (application/zip) gltf, mtl, obj, png |
| Hits |
402 |